How to install Ubuntu 22.04
Installing Ubuntu 22.04 Server as a Hyper-V machine
1. Getting ready:
- Download Ubuntu from the official Ubuntu website by clicking here.
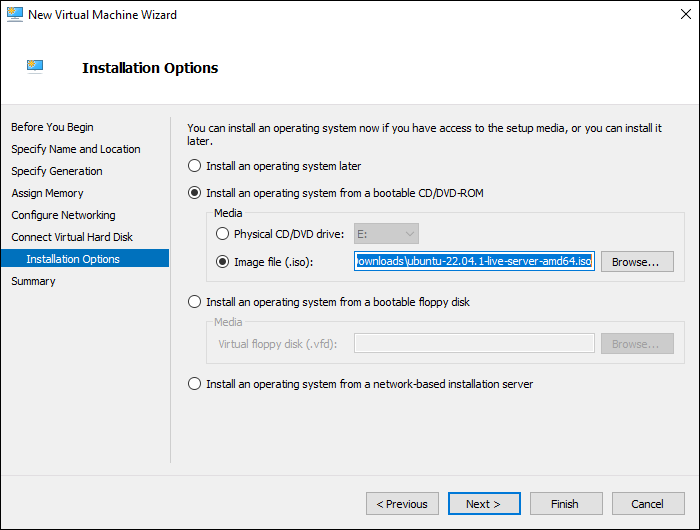
- Create your New Virtual Machine.
2. In the Installation Options of your Virtual Machine select your “.iso” image.
![New Virtual Machine](https://www.cloudtechtips.com/wp-content/uploads/2022/08/1_select_iso.png)
3. When using a “Generation 2” VM (not required with a “Generation 1” VM, skip this step) you need to disable “Secure Boot” in order to properly boot Ubuntu 22.04.
- Take your mouse over the newly created Virtual Machine and right-click, then click on “Settings“
- Deselect “Enable Secure Boot” in order to disable it
![Disable Secure Boot](https://cloudtechtips.com/wp-content/uploads/2023/01/image-6.png)
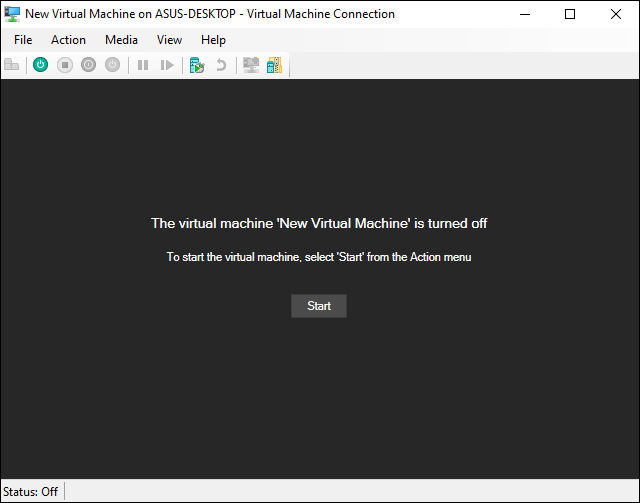
4. Now connect to the created machine and “Start“ it.
![Start Virtual Machine](https://www.cloudtechtips.com/wp-content/uploads/2022/08/2_start_machine.png)
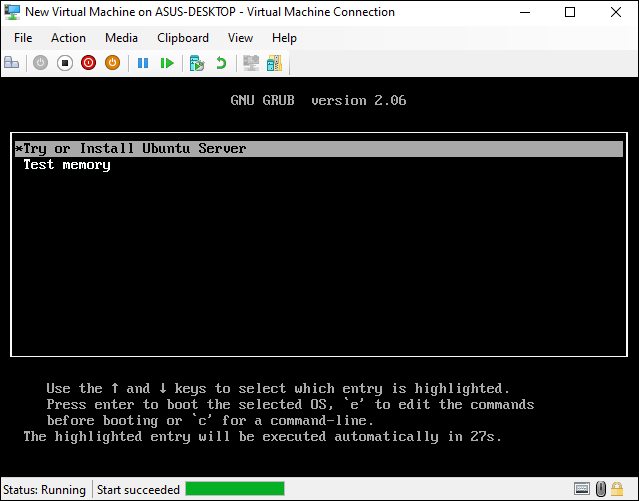
5. To start the installation select “Try or Install Ubuntu Server“
![Try or Install Ubuntu Server](https://www.cloudtechtips.com/wp-content/uploads/2022/08/3_try_install.png)
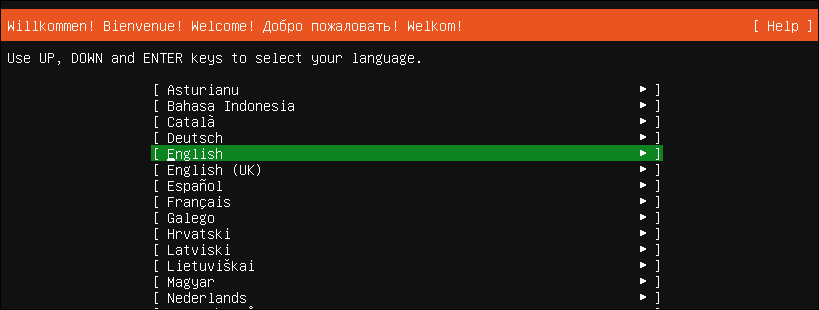
6. Select your preferred Language
![Select your Language](https://www.cloudtechtips.com/wp-content/uploads/2022/08/4_select_language.png)
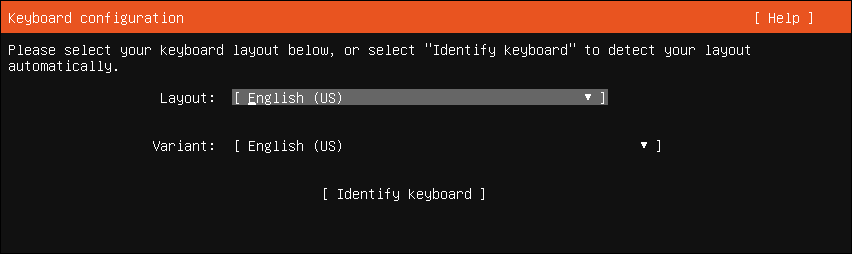
7. Select the keyboard layout
![Keyboard configuration](https://www.cloudtechtips.com/wp-content/uploads/2022/08/5_keyboard_layout.png)
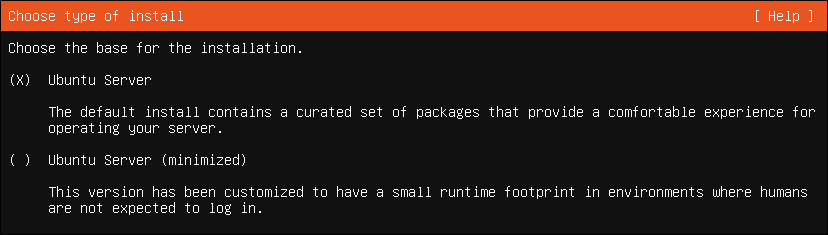
8. Select the installation type
![Choose type of install](https://www.cloudtechtips.com/wp-content/uploads/2022/08/6_chose_normal_minimized.png)
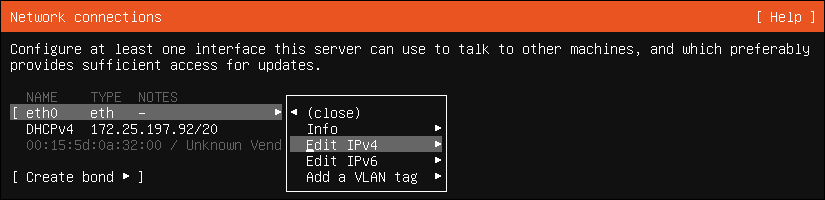
9. Configure the Network Connection
![Network connections](https://www.cloudtechtips.com/wp-content/uploads/2022/08/7_network_01.png)
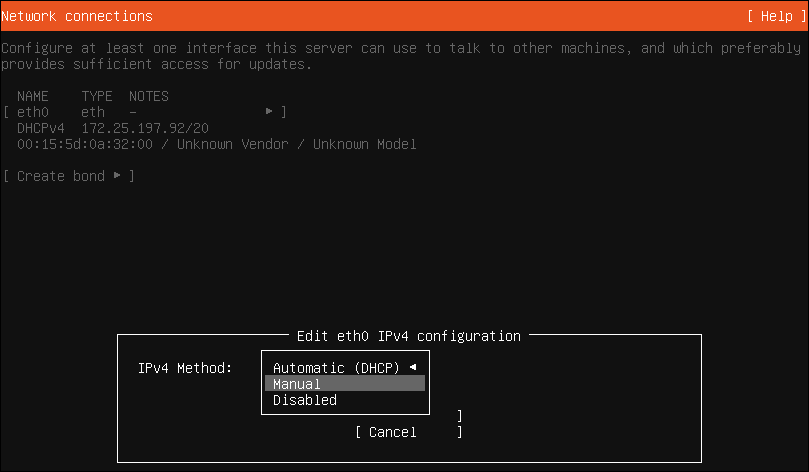
10. Change the Configuration to Manual
![Network connection manual configuration](https://www.cloudtechtips.com/wp-content/uploads/2022/08/7_network_02.png)
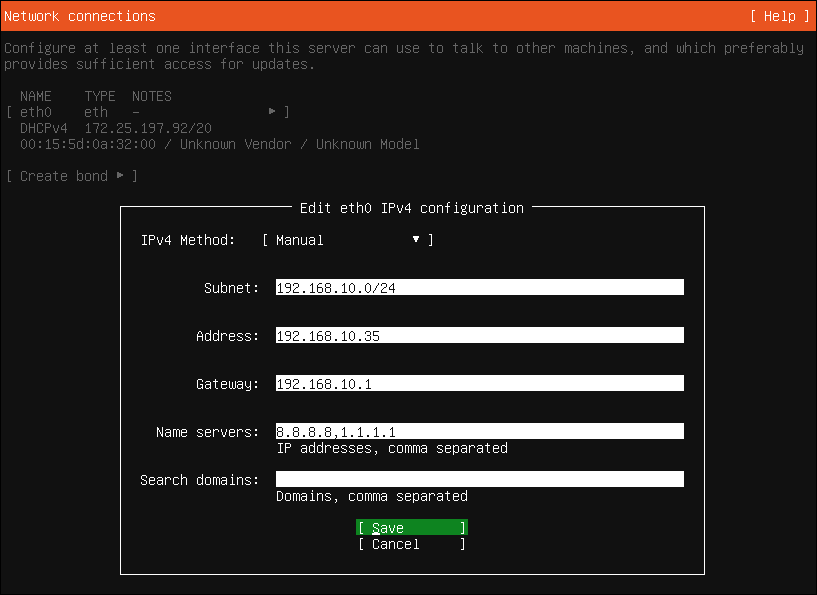
11. Edit the Configuration
![Edit the Network Connection Configuration](https://www.cloudtechtips.com/wp-content/uploads/2022/08/7_network_03.png)
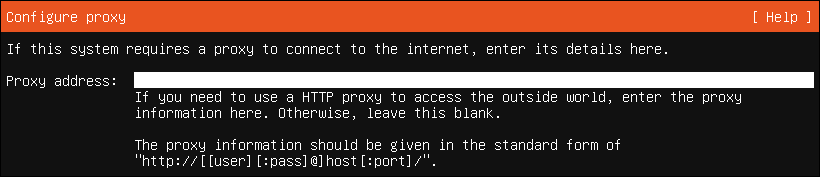
12. Proxy configuration, leave empty if not required
![Proxy configuration](https://www.cloudtechtips.com/wp-content/uploads/2022/08/8_proxy_address.png)
13. Configure archive mirror, often no changes are required
![Configure Ubuntu archive mirror](https://www.cloudtechtips.com/wp-content/uploads/2022/08/9_mirror_address.png)
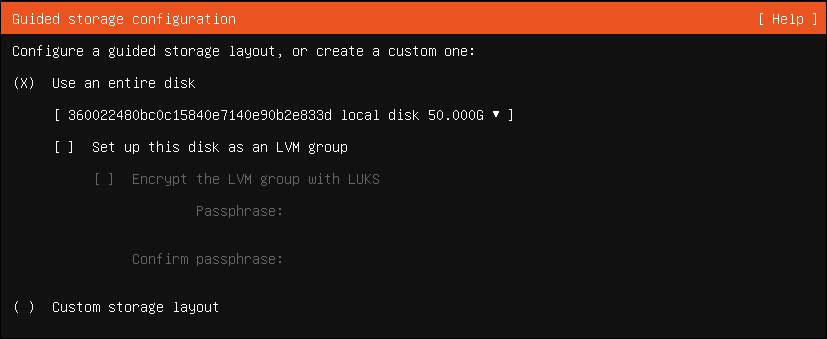
14. Storage configuration
![Storage configuration](https://www.cloudtechtips.com/wp-content/uploads/2022/08/10_storage.png)
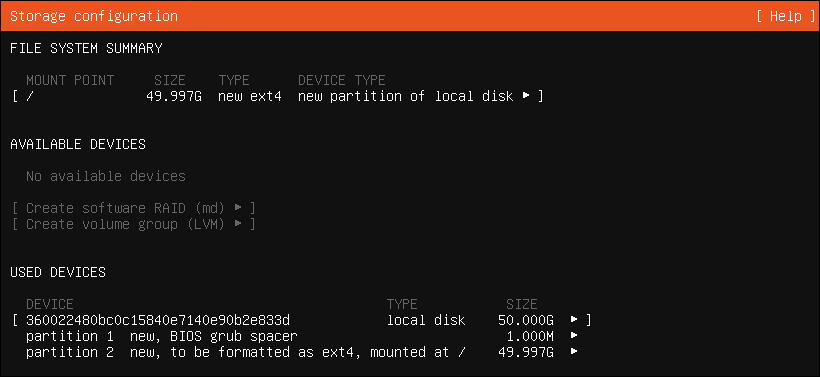
15. Storage configuration summary
![Storage configuration summary](https://www.cloudtechtips.com/wp-content/uploads/2022/08/10_storage_summary.png)
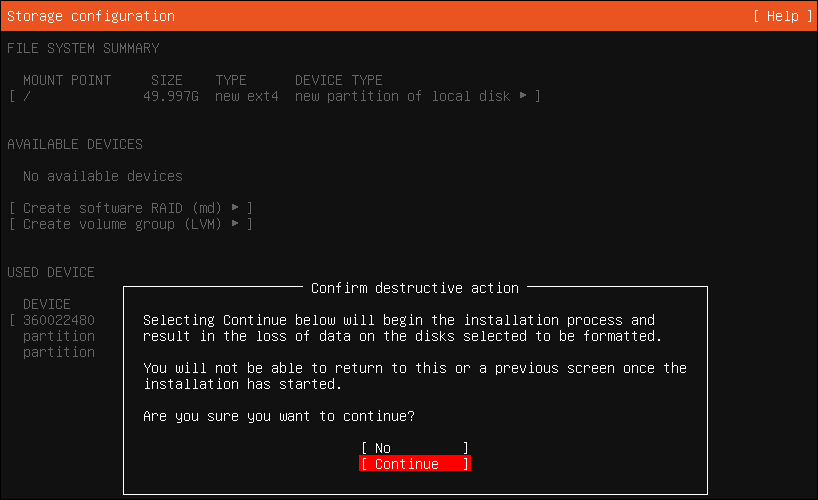
16. Storage configuration confirmation
![Storage configuration confirmation](https://www.cloudtechtips.com/wp-content/uploads/2022/08/10_storage_confirmation.png)
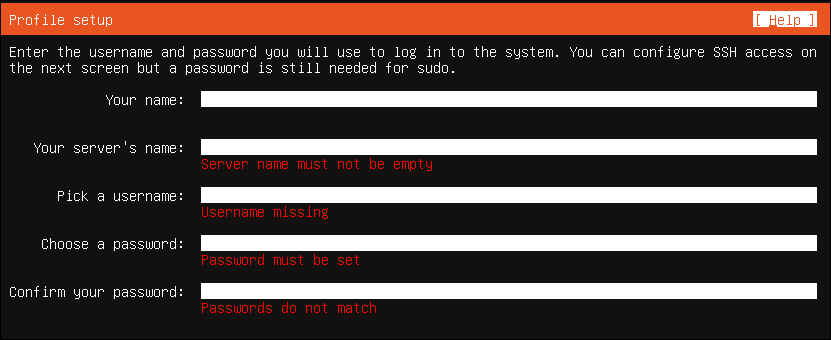
17. User Profile setup
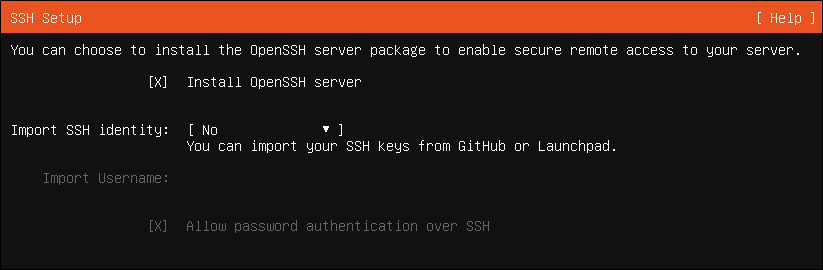
![User Profile setup](https://www.cloudtechtips.com/wp-content/uploads/2022/08/11_user_accounts.png)
18. SSH Setup
![SSH Setup](https://www.cloudtechtips.com/wp-content/uploads/2022/08/12_ssh.png)
19. Third-party drivers
![](https://www.cloudtechtips.com/wp-content/uploads/2022/08/13_drivers_continue.png)
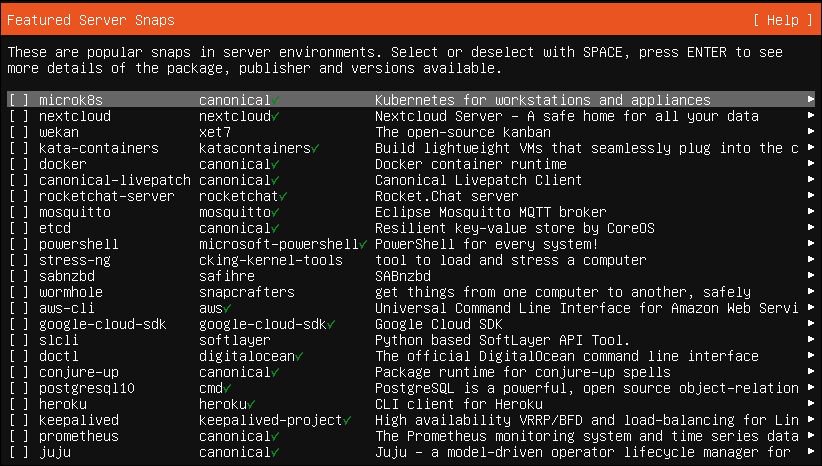
20. Server Snaps, chose one or continue without
![Server Snaps](https://www.cloudtechtips.com/wp-content/uploads/2022/08/14_snaps_choseORnot.png)
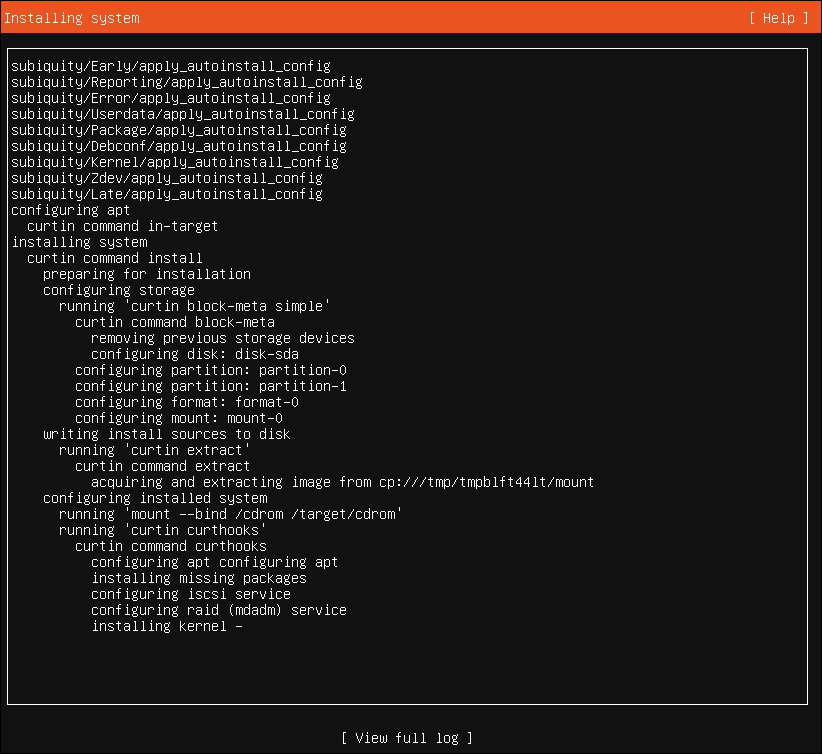
21. Allow the installation to be completed
![Installation in progress](https://www.cloudtechtips.com/wp-content/uploads/2022/08/15_installing_system.png)
Once the installation is completed, reboot, you will then be able to connect to that Server via SSH.
While the installation completes see articles below:
Choosing which SSH Client to use on Windows
How to install File Browser on Ubuntu