How to create and run a Virtual Machine with Hyper-V
Hyper-V is a virtualization solution that virtualizes software. It can virtualize operating systems and hardware components, such as hard drives and network switches.
Before you start setting up a new virtual machine, enable Hyper-V on your Windows 10 or Server, and download your operating system image.
- Get Ubuntu from the official Ubuntu website, either Server or Desktop editions.
- Get Windows from Microsofts’ website using the Windows Media Creation Tool available here.
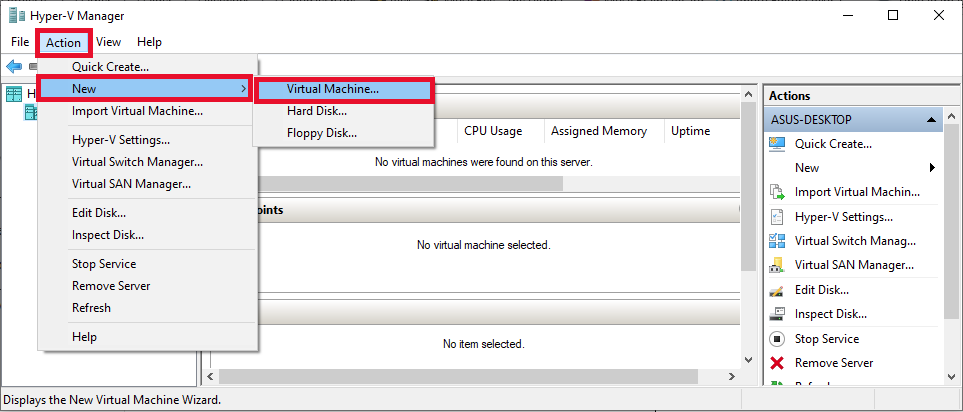
1. In the Action drop-down menu, select New and click Virtual Machine.
2. In the New Virtual Machine Wizard, click Next to start setting up the new virtual machine.
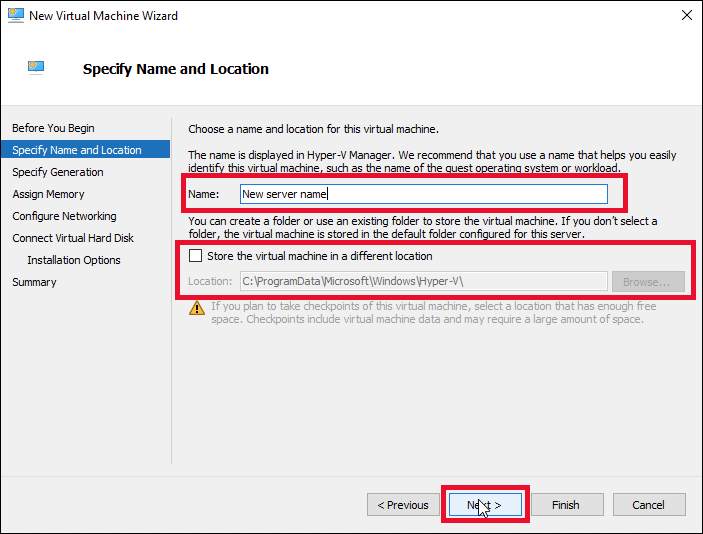
3. Choose a name and storage location for the new virtual machine, then click Next to proceed.
4. Choose the generation for the new virtual machine, then click Next.

Note: Learn more about generation 1 and 2 here.
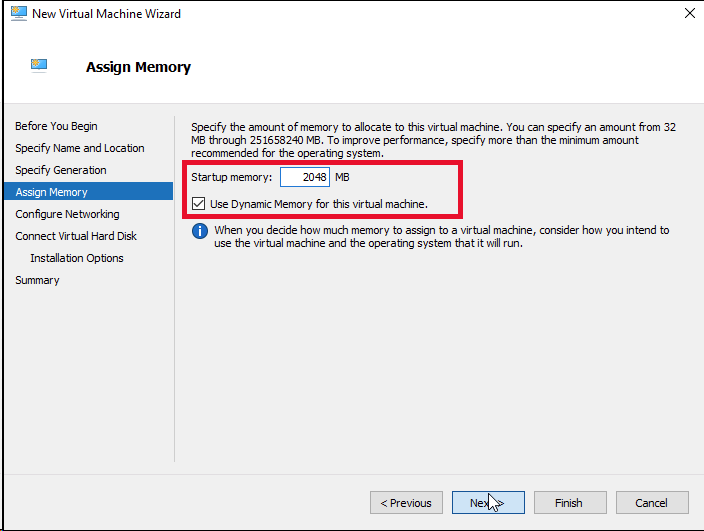
5. Assign the amount of memory to allocate to the virtual machine. Use at least 2048 MB of memory during the installation, you can enable and customize the use of dynamic memory later. Click Next to continue.
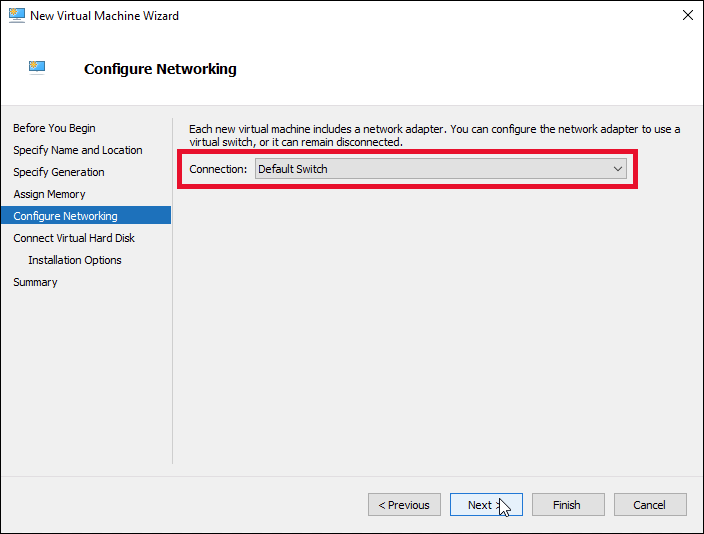
6. Choose your preferred Virtual Network Switch, then click Next.
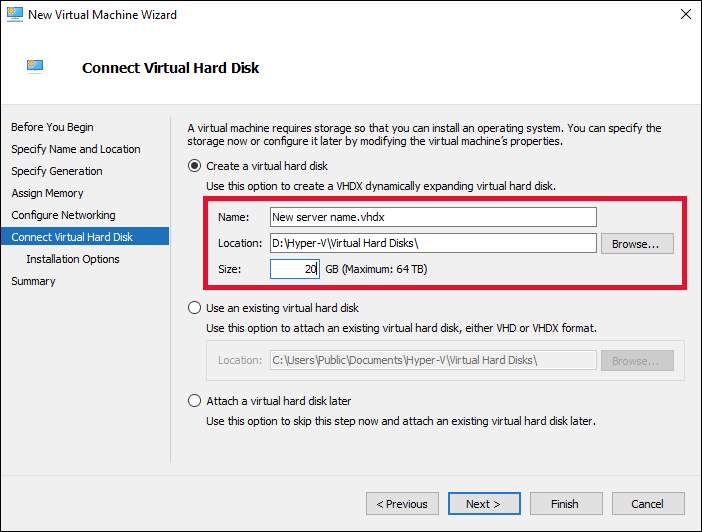
7. Assign the required amount of hard disk space and click Next to continue.
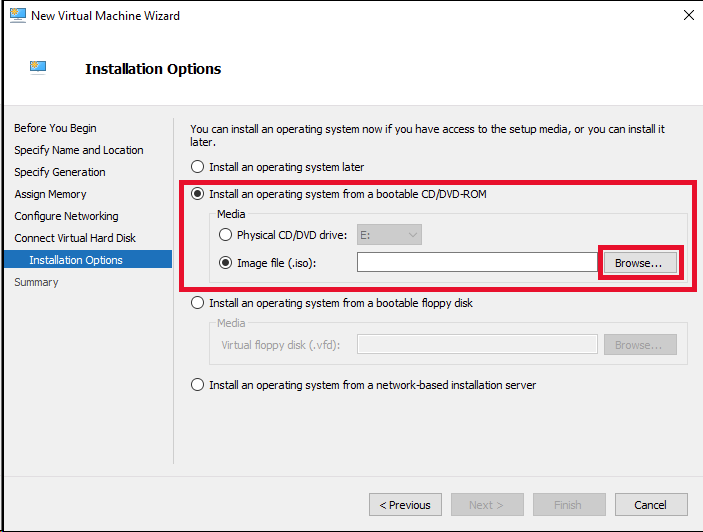
8. Under the Install an operating system from a bootable CD/DVD-ROM option, choose Image file (.iso) and select the image you downloaded. Click Next to continue.
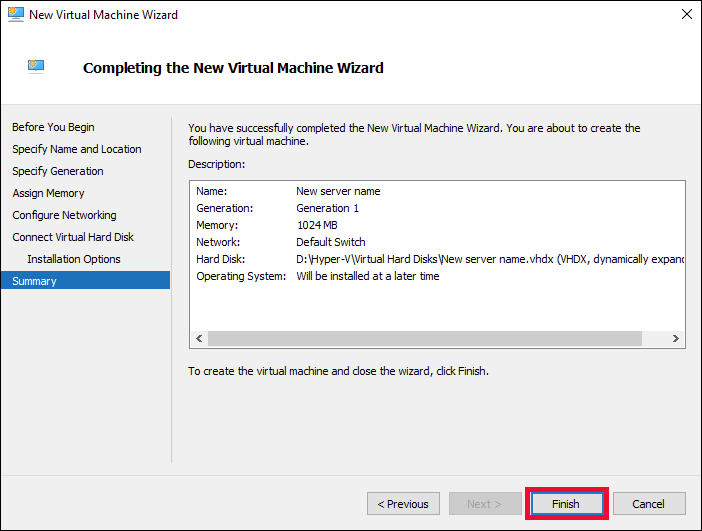
9. The final step offers a summary of the new virtual machine setup. Click Previous to make any changes or click Finish to create the virtual machine.
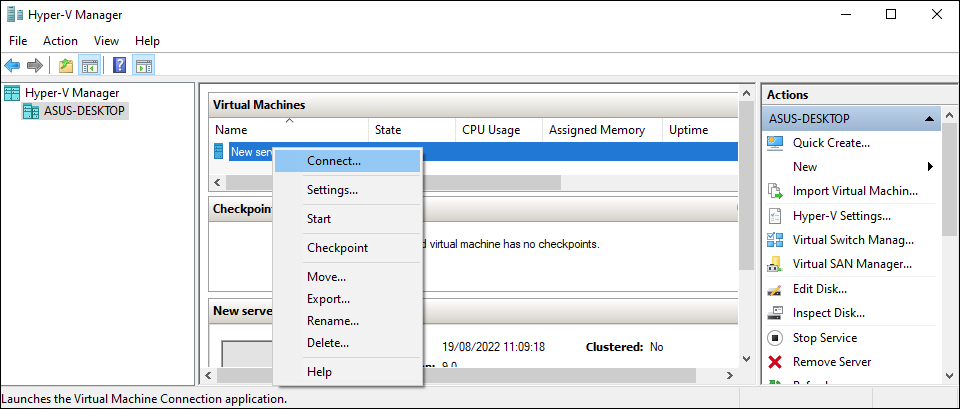
10. Connect to your new Virtual Machine.
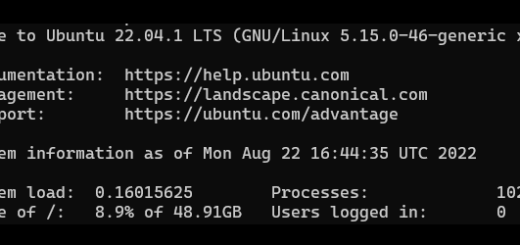
To install Ubuntu Server on the new Virtual Machine see: How to install Ubuntu 22.04